
This is my biggest thrift store makeover collection ever! Candlesticks, frames, mirrors, rusty dump finds, dated decor and a free cabinet all get a second life here, and none of them take fancy tools or a big budget.
Grab a coffee, because there are a lot of ideas in this one. I've grouped them so you can find your favourites, and linked my full tutorials wherever I have one.
My Go-To Makeover Supplies
Homemade chalk paint and baking soda paint
Homemade sand paint and coffee paint for texture
Spray primer and matte black spray paint
Mod Podge Matte, napkins and printed graphics
E6000, a hot glue gun and a heat gun
Instant coffee for staining paper and wood
Water-based polycrylic, engine enamel and butcher block oil
Glass, Candles & Little Decor Flips
Amber tinted candlesticks: brush on homemade Mod Podge tinted with brown food colouring (wear gloves!), dry each coat with a heat gun and sponge on the last coat for a vintage amber glass look.
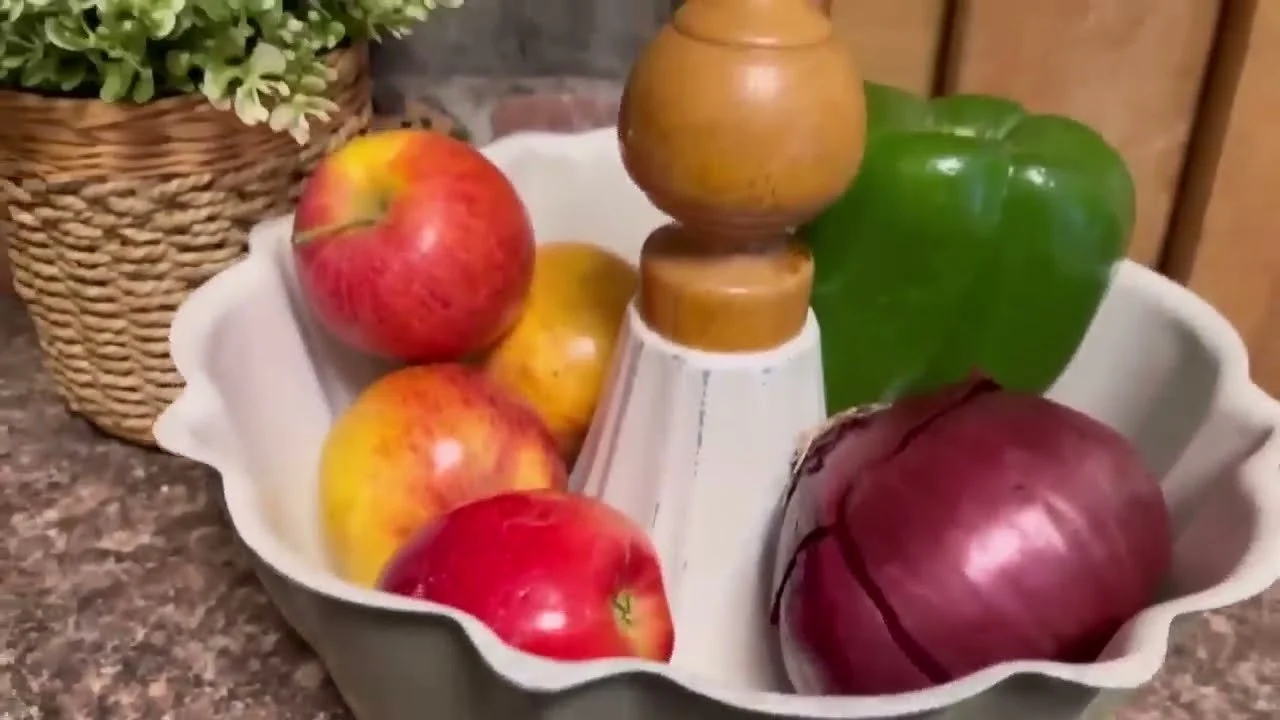
Bundt pan display bowl: glue a furniture finial into a thrifted bundt pan with E6000 for a pretty fruit or seasonal bowl.
Wicker coasters into magnets: glue a magnet on the back for a boho fridge magnet.
Bowl + candlestick catchall: E6000 a wooden bowl onto a candlestick for keys, jewellery or a kitchen catchall.
Spindle candle holder: glue a votive holder upside down onto a distressed spindle.
Tacky candle holder fix: a coat of matte black spray paint makes cheap silver look modern.
Coffee paint candlestick and sand paint vases: textured homemade paints make thrifted pieces look like stone or pottery.
Decoupage piggy bank: prime it, then cover it in small torn pieces of a floral napkin with Mod Podge.
Boho lamp: mask off the cord and socket, then paint a plain lamp base with baking soda paint.
Thrifted light globe: set a vintage glass shade on a lamp base with double-sided tape so you can still change the bulb.
Painted rolling pins: paint just the handles, seal and stand them in a crock on your counter.
Faux greenery glow-up: wash thrifted faux plants and dry brush the leaves with a touch of white paint so they look less fake.
Macramé pot hanger: dollar store twine and a thrifted wooden ring. Thrift stores often sell bags of these rings for a few dollars!
Seasonal Thrift Flips
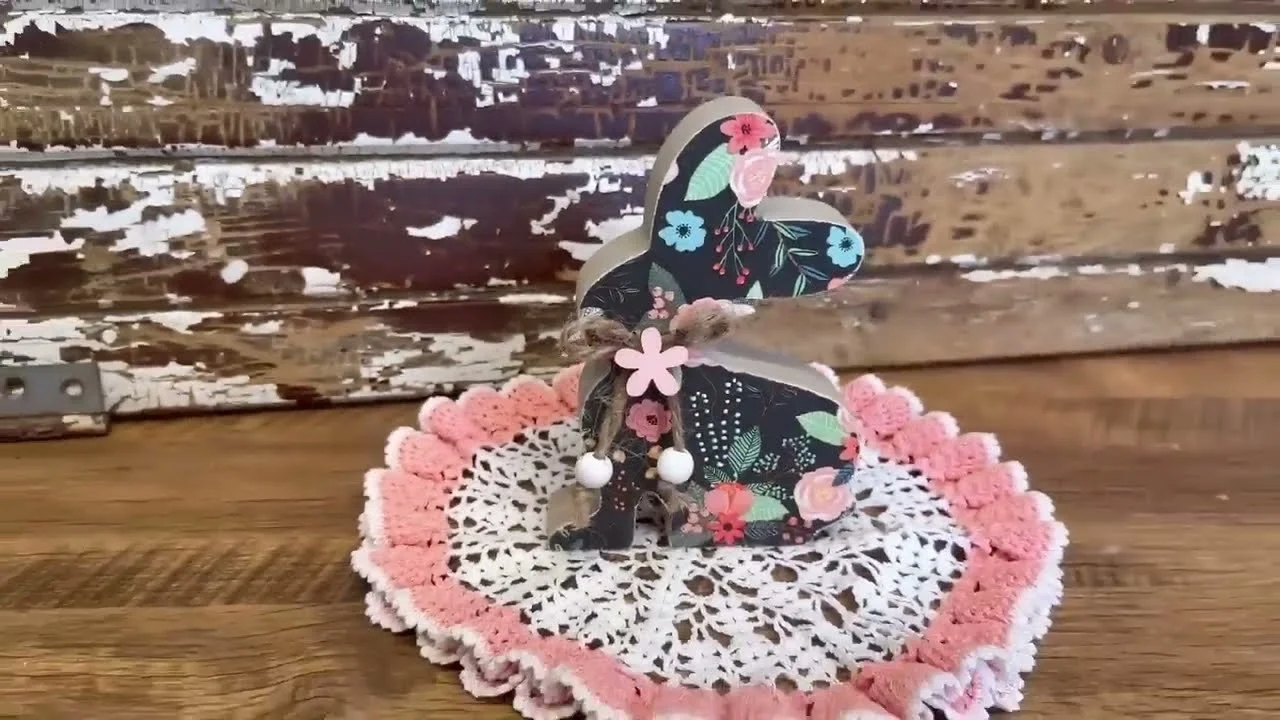
Easter: a dated ceramic duck and bunny become neutral stone-look decor with baking soda paint, sponged on for texture. Thrifted doilies make the perfect display.
Fall & Halloween: a thrifted glass bowl gets three coats of sand paint and is glued onto a candlestick, votive holders get Mod Podge transfers, and dollar store pillar candles get custom napkin designs.
Napkin candles: wrap the napkin around the candle, cover it tightly with wax paper (waxy side in) and heat it with a heat gun or hair dryer until the napkin melts into the wax.
Faux rust: dab Mod Podge wherever rust would naturally form and sprinkle on cinnamon.
Dump Finds & Garden Decor
Plant stand to farmhouse stool: sand it, distress it with a chain, hammer and utility knife, then finish with a mix of black and clear shoe polish as wax.
Rusty shovel and pitchfork signs: clean, sand, chalk paint and add a Mod Podge reverse transfer. Spray primer first if you don't want rust bleeding through.
Rake rack: mount a rusty rake on scrap wood as a rustic coat or jewellery hanger.
Sun-bleached lanterns: a light coat of white spray paint brings dump lanterns back to life.
Rusty lantern: keep the rust and seal it with engine enamel so it can live outdoors.
Antique milk can: tape off a square, paint it white and add a family name graphic.
Birdhouse makeover: fresh paint and a salt-painted chippy roof.
Garden planter: a wire basket, trivet and old table spindle screwed together and painted black.
Bleached wicker baskets: soak them overnight in a tote of warm water and bleach to lighten them.
Signs from Scraps
Decoupage spring sign: napkins on an old table leg. Tear the edges where two napkins meet so they blend.
Crackle sign: distress new wood, paint it black, then use Elmer's glue under the top coat for big crackles. See my crackle technique.
Tie-dye beach signs: blob on a few paint colours and blend them with plastic wrap. So much fun with kids!
Welcome Home and Garden Tours signs: Mod Podge reverse transfers on painted boards. Dampen just until the words show through.
Dollar store plaque: peel off the old paper and decoupage scrapbook paper you've thinned by pulling packing tape off the back.
More sign ideas in my guide to DIY wooden signs.
Frames, Mirrors & Art
Butterfly print: coffee stain printer paper (instant coffee in a squirt bottle, dried with a heat gun) and print vintage ephemera on it.
Abstract art from paint scraps: frame a piece of paper covered in leftover paint from old projects, add stamps and a vinyl quote.
Chippy distressed frames: chalk paint over landscape prints and frames, using candle wax where you want the paint to chip off.
Layered crackle frames: splash on colours, add a thick coat of hairspray, then white acrylic in long strokes dried with a heat gun. Here's my hairspray technique.
Patina mirror: dry brush a plastic gold frame with black chalk paint, then turquoise acrylic, for an old metal look.
Boho fringe frame: lark's head knot leftover macramé cord around a dollar store frame.
Egg carton flower frame: cut egg cups into petals and hot glue them into flowers around a frame.
Ornate gold tray: candle wax, gold metallic paint, more wax, then a top coat so the gold peeks through when you distress it.
Vintage map art: coffee stain a printed map and frame it.
Furniture & Storage
Jewellery box: pull out the dusty lining, scuff, prime and paint with chalk paint.
Toolbox towel holder: paint and sand a thrifted toolbox and hang it with sawtooth hangers.
Teapot drawer hanger: spray paint a teapot and attach it to a drawer with an old door pull.
Cabin coat rack: remove the broken hooks, sand and distress for a rustic log home look.
Free cabinet: matte black chalk paint and spray-painted original hammered hardware.
Spice rack paint organizer: scuff off the dated orange stain, seal with engine enamel and fill it with craft paint bottles. They're the same size as spice jars!
Breadboards: clean, sand, coffee stain and seal with butcher block oil so they're food safe. Mineral oil or beeswax work too. Never use cooking oil, it goes rancid.
Coffee-stained lazy Susan: wipe on instant coffee mixed with water to make the wood grain pop.
Mini rocking chair: clean it up and add a black-painted vase with moss and a faux succulent.
Wooden bead garland: thrifted beads and yarn tassels wrapped around your phone.
My Best Thrifting Tips
Look past the dated finish. Shape and quality matter more than colour.
Check the tool and kitchen sections for breadboards, scrap wood, rolling pins and trays.
Save your bits and pieces. Spindles, finials, table legs and broken tools always become something.
Some things are worth keeping as is. Not every vintage find needs a makeover.
Want more? See 7 thrift store Christmas DIYs, 39 glass jar hacks and 18 tin can upcycles.
If you give it a try, I'd love to see how it turns out! Tag me @OurUpcycledLife on social media. I always enjoy seeing your beautiful creations. 💕 Until next time, happy crafting!
