
I can't throw out a glass jar. Pickle jars, salsa jars, wine bottles and even the little lids all get rescued from my recycling bin, and they turn into some of my favourite (and best-selling) DIYs.
I've gathered all my best glass jar hacks in one place, from getting the labels off to painting so it never chips, tinting, crackling, twine lanterns, a clay crock and even what to do with the lids. Every one starts with something that was headed for the garbage.
What You'll Need
Glass jars, bottles and their lids
Dawn dish soap, white vinegar, rubbing alcohol and an SOS pad
Spray primer (or flat white spray paint)
Homemade chalk paint and a sponge
Mod Podge Matte and water-based polycrylic
Graphics printed on cheap printer paper (laser printer works best)
Napkins, label sheets and clear page protectors or shelf liner
Elmer's school glue and gel food colouring
Jute twine, packing paper, air dry clay and a hot glue gun
Get Your Jars Clean (Labels, Gunk & Smells)
The soak: fill the sink with the hottest water you can get, a squirt of Dawn and about 1/4 cup of white vinegar. Fill the jars with hot water too so the glue loosens from the inside out, then add a kettle of boiling water and let everything soak for 15 minutes.
Scrape with a butter knife. The smooth edge lifts most soaked labels and glue without scratching.
Plastic labels? Heat them with a heat gun on high, then lift with a scraper. Don't grab it with your fingers, it's hot! A heat gun also pops wine bottle labels right off without soaking.
Sticky residue: a little olive oil works, but my favourite is a damp SOS pad. It works about 95% of the time. (I tried peanut butter, and it didn't work for me!)
Pickle smell: soak the jar overnight in the sink with a little bleach and water.
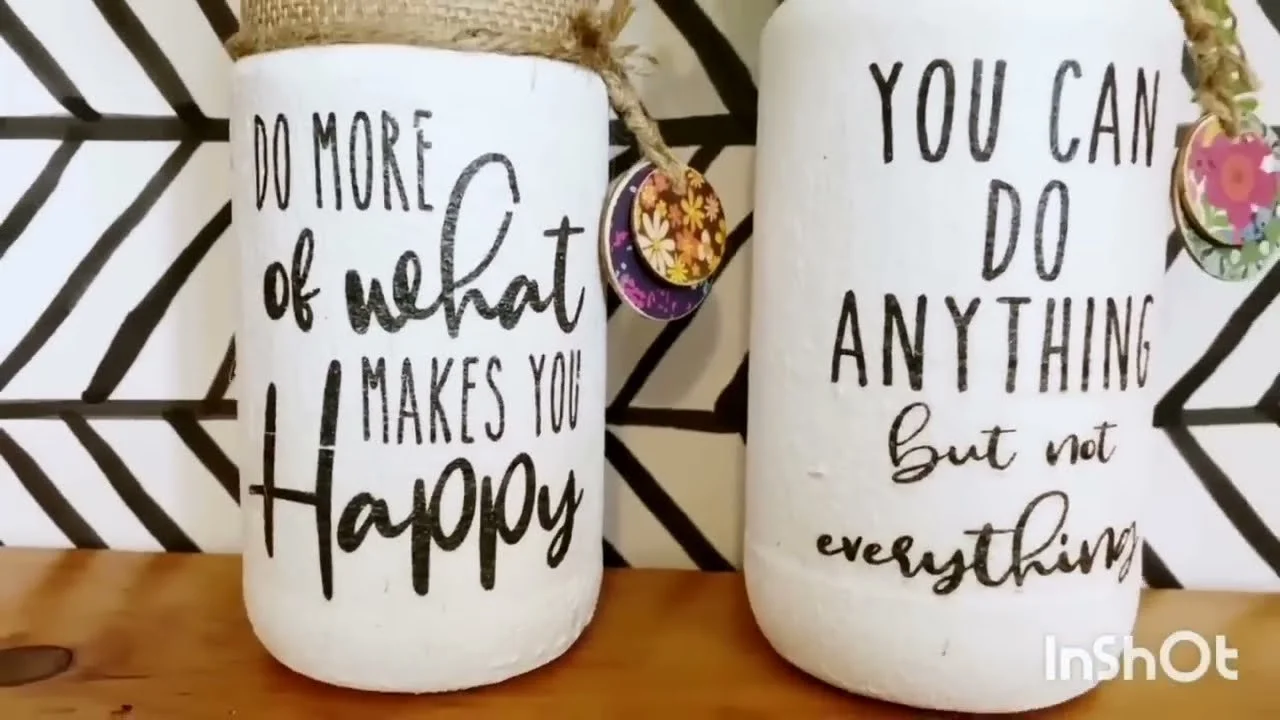
How to Paint Glass So It Never Chips
Wash the jar in hot soapy water, then wipe it with rubbing alcohol. Any grease left behind will make your paint peel.
Give it a light spritz of spray primer. It doesn't need full coverage, just something for the paint to grip.
Brush on a thin coat of chalk paint with long strokes. Chalk paint works much better on glass than acrylic or latex.
Let it dry completely, then add a second coat. If the first coat is still damp, the next one will lift it.
Sponge on the final coat to get rid of brush marks. It gives a lovely pebbly texture.
Little tricks: lay bottles against a lint roller so they don't roll while you work. To spray paint a lid, screw it onto a jar and hold the jar. If you'll use the lid, leave the rim unpainted so it doesn't peel off. See my full how to paint glass jars tutorial and my DIY chalk paint.
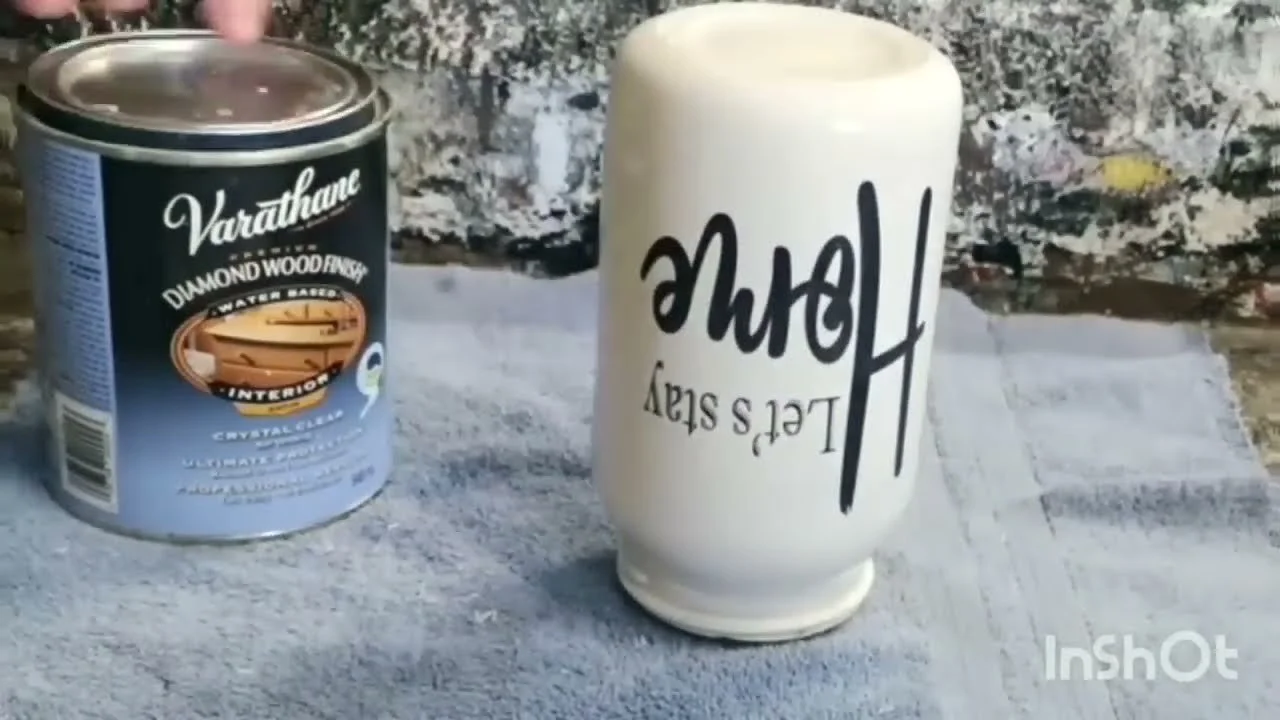
Painted Jars with Graphics
Baking soda paint + napkin decoupage: paint the jar with baking soda paint, then decoupage on a homemade napkin. Wet the edges of the napkin with a stiff brush so you get a ragged edge that blends in.
Mod Podge reverse transfer: print a reversed graphic, brush a light coat of Mod Podge on it, press it onto a painted jar and let it dry 24 hours. Dampen it just until the words show through and rub the paper off.
Hanging plant jar: hang a painted salsa jar with a graphic from a thrifted banana hanger with twine and add a faux succulent.
Knob lid jar: E6000 a knob from your stash onto the lid, spray paint it black and add a graphic with torn napkin flowers around it.
Primitive dirt jar: decoupage a ragged-edge, coffee-stained graphic, coat the jar in Mod Podge and sprinkle on garden dirt. Cinnamon or coffee grounds work too! Dry with a heat gun and seal.
Coffee-stained bottle: dab instant coffee and water over white chalk paint for an antique look, then decoupage on a coffee-stained label.
Add a pop of colour: dry-brush a little acrylic paint over a black and white graphic before you seal it.
Clear Sticker Labels for Clear Glass
Peel the labels off an old CD or address label sheet and print your graphic on the shiny carrier sheet with a laser printer.
Lay a piece of clear page protector or shelf liner over the graphic. You only get one try, so go slowly!
Press it down hard with a scraper or old credit card, trim it and peel. The ink comes with it.
Stick it on a clean glass jar, candle or bottle. It peels off, so you can change it later.
For a different look, swirl acrylic paint inside a clean bottle first, let it dry, then add your sticker.
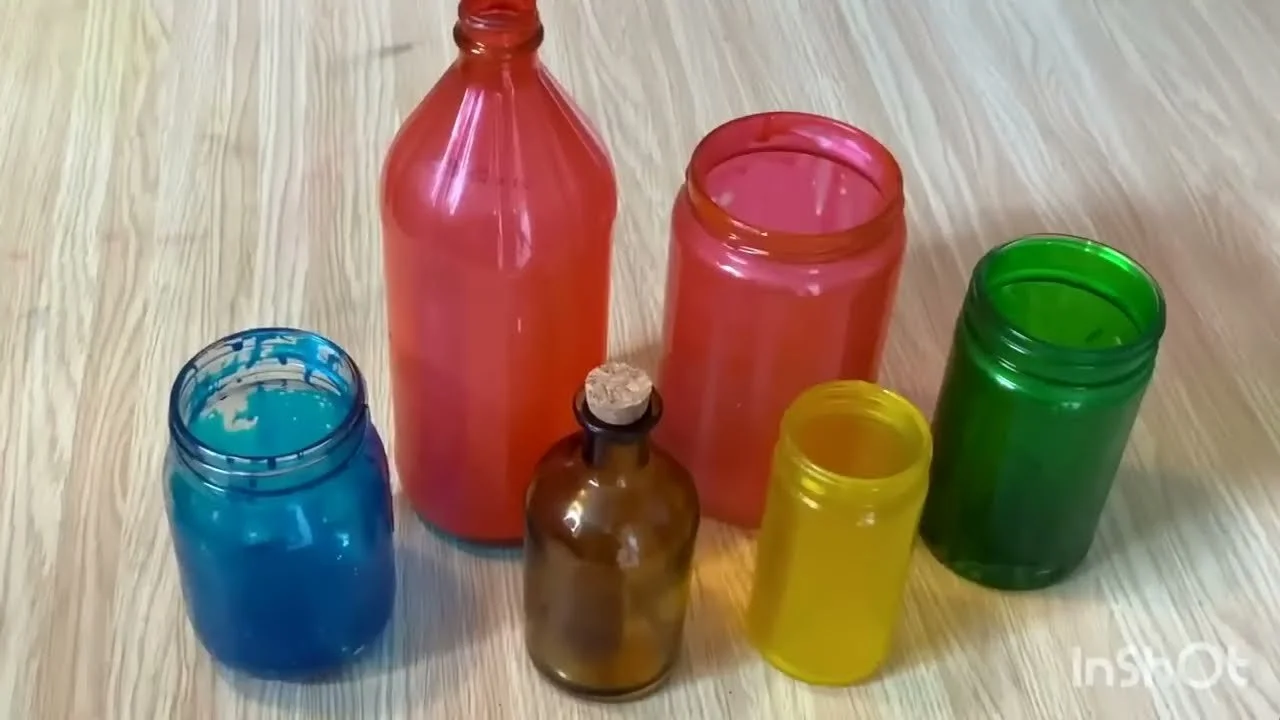
Tinted & Crackled Glass
Tinted jars: mix Elmer's school glue with lots of gel food colouring (it lightens as it dries). Swirl it inside a squeaky-clean jar, drain it upside down, then bake at 175–200°F, turning every 5 minutes until it's clear, about 30 minutes. It's decor only, not for water.
Tint the outside: sponge the same glue mixture onto dollar store candlesticks you can't reach inside. Soak it off in hot soapy water to redo it for the next season.
Crayon crackle glass: scribble all over a jar with a white crayon, then brush on polycrylic mixed with very fine glitter. Repeat 2 or 3 times and dab the last coat. It sparkles beautifully with a candle inside.
Crackle paint: over a dark base, brush on school glue (big crackles) or a heavy coat of hairspray (fine crackles), add white chalk paint in long strokes and dry it with a heat gun. Work in panels with the bottle on its side. Here's more on my crackle technique.
Twine, Packing Paper & Clay
Easy knotted bottle cover: tie a twine ring for the neck, add eight strands with lark's head knots and knot the inside pairs row by row for a diamond pattern. No macramé skills needed!
Rope lanterns: tint the jars sea glass green or blue, then glue on jute strips or knot a twine net. Add a braided handle, sand and a battery candle.
Packing paper wrap: scrunch packing paper around a jar, gather it at the top with an elastic and cover that with a twisted strip. Wine bottles look elegant wrapped this way too.
Packing paper rope jar: twist paper into ropes, dip them in tinted homemade Mod Podge, hot glue them around the jar and paint.
Air dry clay crock: wrap a pickle jar in rolled air dry clay over Mod Podge, add handles and a moulded frame. It cracks as it dries. Embrace it! Cover with torn napkin pieces, paint a linen colour and add a transfer. See my DIY silicone molds.
Don't Toss the Lids!
Prime them first or the paint will peel. Then try:
Gift tags with a cardboard circle and a printed scrapbook paper insert
Fridge magnets with a decoupaged quote and a twine fringe
Coasters filled with coiled jute, chalk paint and a graphic, sealed with engine enamel
A candle holder with dollar store wooden cutouts and sand paint
Garden markers glued to a wooden stake and sealed for outdoors
A wind chime made from colourful lids hanging from a painted tin can
My Best Tips
Less Mod Podge is more. A thick coat leaves an outline around your graphic.
Use the cheapest, thinnest printer paper. There's less paper to rub off.
Go easy on the water when rubbing off paper on painted glass, or the paint lifts. Start in the middle and finish with your fingertips.
White backgrounds work best for transfers, and neutrals sell best if you're making jars for craft sales.
Seal everything with polycrylic. Your jars can be dusted and wiped, but they aren't dishwasher safe.
Love glass jars as much as I do? Try my decoupage for beginners tutorial and these 16 photo transfer hacks.
If you give it a try, I'd love to see how it turns out! Tag me @OurUpcycledLife on social media. I always enjoy seeing your beautiful creations. 💕 Until next time, happy crafting!
