
I get so excited when I'm working with air dry clay! It's cheap (my last pack was $1.75 at Dollarama), it's easy to work with, and you don't need any special tools. Today I'm sharing 5 beginner-friendly air dry clay projects: textured ornaments, pretty trinket dishes, DIY beads, a sign embellishment and a faux antique crock made from a pickle jar.
They make wonderful handmade gifts too. Just leave yourself a few days for drying!
What You'll Need
Air dry clay (dollar store clay works great, or make your own homemade air dry clay)
A rolling pin and two thin wooden slats as thickness guides (about 1/4 inch)
Texture makers: drawer liner, stencils, doilies, twine, leaves, faux greenery, stamps, forks, spoons and more
Small cookie cutters, an X-Acto knife and a skewer or straw
Cling wrap and a few bowls to use as molds
Cornstarch and a teaspoon (for beads)
Acrylic or chalk paint, a scuff pad and fine sandpaper
Polycrylic spray sealer
Hot glue or Gorilla Glue, Mod Podge and a printed graphic
Air Dry Clay Basics
Roll it evenly. Set two thin wooden slats on either side of your clay. Your rolling pin stops at the wood, so the clay is the same thickness all the way across.
Keep it sealed. Pop leftover clay back in a zippy bag so it doesn't dry out.
Know when it's dry. It should be one even, chalky colour with no darker damp patches. Drying can take one to three days depending on your weather.
Expect shrinkage. Air dry clay shrinks a little as it dries.
1. Textured Ornaments & Gift Tags
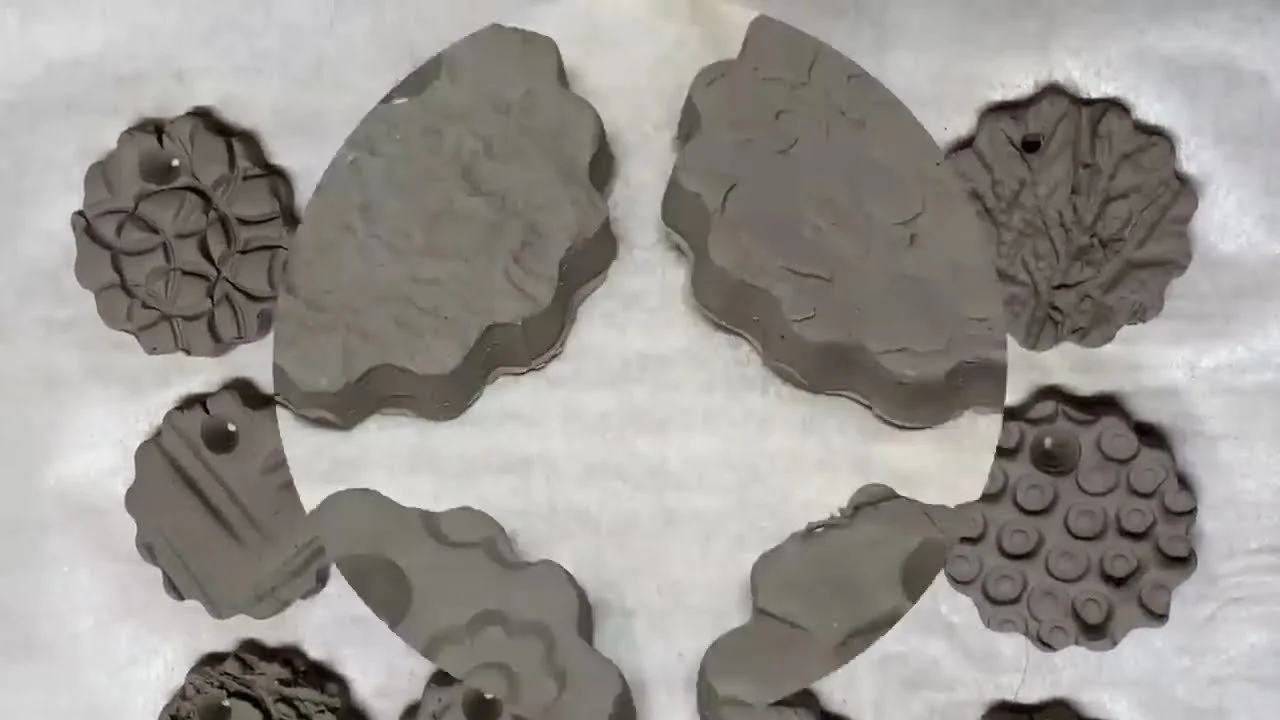
Go on a texture hunt around your house! Roll out your clay, press or roll something textured into it, then cut out shapes with a little cutter. Some of my favourites:
Dollar store drawer liner (gives a gorgeous diamond grid)
Stencils, doilies and peel-and-stick burlap tape
Twine woven back and forth, then rolled
Real leaves, faux greenery and even a dried orange slice
Rubber stamps, the end of a pen or glue stick, a comb, the back of a spoon, a fork, a clothespin and even a wicker basket
Poke a hole in the top with a skewer or straw before they dry, then add jute twine. I love tying them onto Christmas and birthday presents. They're one of a kind and so personal.
2. Textured Trinket Dishes
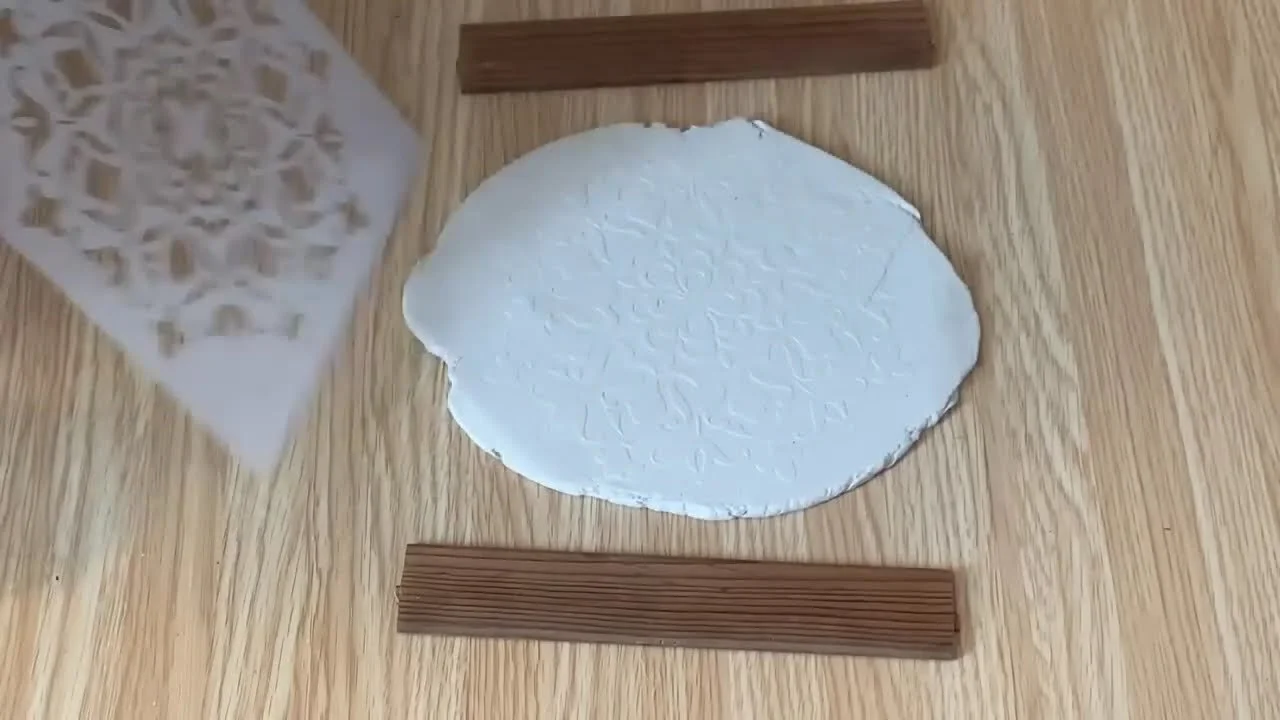
Roll out your clay and press in a texture. I used a stencil, a thrifted doily and dollar store drawer liner for three different dishes.
Set a bowl on top as a template (don't press it down) and trace around it with an X-Acto knife. Peel away the extra clay.
Smooth the edges with a damp finger.
Line a bowl with cling wrap and gently press the clay inside so it takes the bowl's shape as it dries.
Once it's completely dry (mine took three days), lift it out and smooth any rough spots with a scuff pad. Sandpaper is too rough!
Paint with acrylic, chalk or spray paint, working it into all the nooks and crannies.
Seal the front and back with polycrylic spray.
Optional: hot glue little wooden beads underneath as feet.
3. DIY Clay Beads & Garland
Dust a teaspoon with cornstarch, press clay into it to measure, then roll it into a ball.
Push a skewer right through the middle (from both ends), then gently reshape.
Let them dry overnight and lightly sand any rough bits.
To paint them fast, put a little chalk paint, a few drops of water and some fine sand in a small container with a tight lid. Add a few beads and shake!
Dump them on a paper plate and dry with a heat gun on low (a hair dryer blows them away).
String them on jute and add a tassel and a little hang tag. My tip: dip the end of your string in fabric glue so it stiffens and threads easily.
Keep in mind each brand of clay dries a different colour, from white to stone, so pick the one you like if you're leaving them natural.
4. Clay Embellishment for a Wood Sign
Press air dry clay into a silicone mold (see how to make your own silicone molds), flatten the back and pop it out. Once it's dry, glue it onto a painted sign, paint over it with chalk paint and dry brush a little black around the details. Finish the sign with a Mod Podge image transfer. Signs like this always sell really well!
5. Faux Antique Crock from a Pickle Jar
Wash the jar well (soak it overnight in a little bleach water to get rid of the pickle smell) and give it a light coat of spray paint so the clay grips.
Roll the clay to about 1/4 inch on parchment dusted with cornstarch.
Brush the jar with Mod Podge and, while it's wet, wrap the clay around it. Patch any gaps with extra clay and smooth everything with damp fingers.
Roll it over a textured surface for extra character.
Add a molded clay piece on the front (score both surfaces with a damp, stiff brush so it sticks) and shape two little handles.
Let it dry overnight. It will crack as it shrinks. Embrace it!
Cover the whole jar in torn pieces of one-ply napkin and Mod Podge. This strengthens it and looks just like an old crock.
Sponge on a linen-coloured acrylic paint, dab on antiquing dust (or dark wax) and add a graphic with a Mod Podge transfer. Use plenty of Mod Podge because clay is absorbent, and rub the paper off slowly so you don't reactivate the clay.
Seal with a matte polycrylic spray.
My Best Tips
Don't be intimidated. Air dry clay is beginner friendly and very forgiving.
Plan ahead for gifts. Most projects need a day or more to dry before you can paint them.
Lift gently. Move your clay carefully so you don't squish all that beautiful texture.
Use a scuff pad, not sandpaper, to smooth dishes without scratching the texture.
Seal everything with polycrylic so your pieces last.
If you give it a try, I'd love to see how it turns out! Tag me @OurUpcycledLife on social media. I always enjoy seeing your beautiful creations. 💕 Until next time, happy crafting!
